2018/12/09
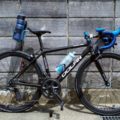
The Chinese carbon frame road bike I ordered at Alibaba around early April was completed last week. 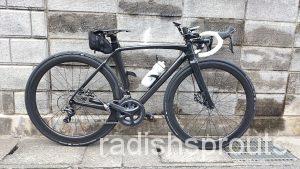 I bought a frame called Synergy Sports, a Chinese manufacturer's SFR115-D. Because it is a believer in disc brake teachings, it is a disc brake compatible frame. Even if you searched, no one seems to be using this frame, and it did not seem to be a so-called classic Chinese frame.
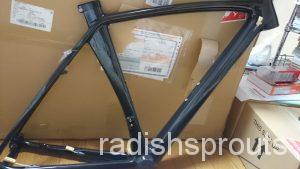
we also ordered a handle, saddle, 50mm rim and bottle cage made of carbon from the same manufacturer.  I was worried about whether the rim should be 50mm or 88mm, but I chose 50mm.
 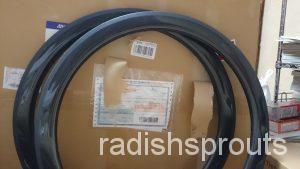 Because I was mendexa and did not want to paint from the beginning, all the surface processing was made 3K gloss. It was said that the delivery time would take 45 days if the frame was 3K glossy, so I changed it to UD gloss and arrived safely before GW. If you buy only the rim, the wheel is hand-assembled, so I also looked for a hub. The 11-speed disc brake hub was decided to use the FH-CX75 for cyclocross. The brake caliper is br-R517 for loading. Since the hydraulic disc is high, select a mechanical disc. The lever ratio is the new Super SLR. The component was 105 and Artegura troubled to Artegura. Because it is a disc brake, parts around the brakes are unnecessary, so it was necessary to order separately instead of a compo set set, but it seems that it was just after the price increase announcement that I tried to order, and some parts were sold out at Wiggle, so I looked for it elsewhere, I was able to order cheaply on an overseas site called Merlin Cycles. The tyres were Wiggle Schwarbewan and the cycle computer was Garmin Edge 510, which was also cheap for bikeinn. Even if I thought about the postage, there were many cases where it was cheaper to buy it overseas than to buy it in the country. Assembled in the place where the parts are aligned. First of all, I applied force to Chinese carbon to check whether there is a strange sound. For the time being, there was no work to press the under ball of the headset into the fork, just pushing the broken loop by hand. Next, after installing the bottom bracket and crank, pass the fork through the frame to install the seatposts and saddles. Temporarily attach the tires of commuter cars to the front and rear, and actually adjust the seat height across the saddle. Since the seatpost is too long and interferes in the frame, cut the seatpost roughly at a length, adjust the height of the saddle, adjust the height of the handle according to the height, and cut the leftover column. The frame is put once in this, and then the hand assembly of the wheel. The spokes were ordered by calculating the spoke length when the rim and hub arrived. This time, 28 266mm and 28 268mm. There is a way of assembling for disc brakes with 3 crosses, but the commuter car is also disc brake, so I completely paked how to assemble the spokes of commuter cars without thinking about anything. It was unexpectedly interesting though it was likely to fall into the center and the infinite hell with the vertical swing, the shake, the center, the shake, and the center.
 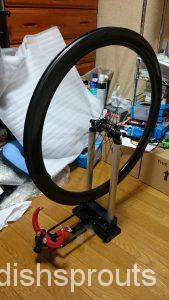 I think that the swing has probably become less than 1 mm, but since it is a disc brake, it seems to be more acceptable for runout than caliper brake.
 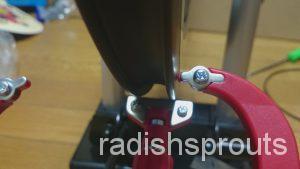 The front and rear wheels are finished assembled, and if you temporarily attach it to the frame for the time being, the diameter of the disc rotor apparently does not fit. The commuter car is 160mm of the international mount, but the frame corresponded to 140mm of the post mount. Since the caliper is post-mount compatible, the post-mount → post-mount adapters were only 160mm → 203mm, so when I purchased it and attached it to a 140 mm post mount, it became a position corresponding to the 180 mm diameter. I only have to buy a 140mm disc rotor obediently, but it was about 4,000 yen for two 180mm disc rotors and two adapters because it was close to 10,000 yen for two sheets. The disc rotor diameter also fits safely, the wheels are fitted with tubes and tires, and the rest is the handling of brakes and shift wires. The handle and frame are both built-in cables, so it's quite a mendokusai. The brake outer cable passed through the steering wheel easily, but the shift outer cable seems to be suddenly bent inside, so it does not pass easily. Because I could not help it, the outer cable came out with a sluggling when I passed the inner cable which was not used with the outer cable inserted into the handle, and pulled the inner cable to the fullest. The frame is completed through the inner cable by pulling out the tube when it comes out through the outer cable with the tube through the pre-threaded tube as a guide. The shift cable here is partial from the outer cable from the STI lever to the frame and from the outlet to the derailleur, while the brake cable also passed through the frame, so the brake cable was more mendexa. The cable has been successfully routed, the chain has been installed, the delayer is installed, and the adjustment has been completed, and I am now able to run for the time being. I also thought of testing the psycon at the time of the test run, but the handle is an aero shape integrated with the stem, and the upper part of the handle all want to be flat, so I can not attach the stay of psychocon and light … The psycon came with a stay to attach with rubber, but when I installed it, it seems to be shredded sooner or later because of the rubber extension. I thought what was going on and examined it on the net, and there was a type of stay to attach to the column, so I decided to attach both lights and psychotons to the column stay. I tried it and it seemed to be okay somehow, so I wrapped the bar tape and completed it.
 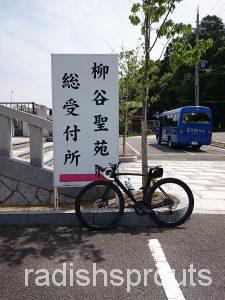 Commuting so far has been 18. It remains a 5kg iron geta, but I will ride this bicycle only on weekends.









![I went to Kasagi Campsite for a bicycle camp [Part 3] I went to Kasagi Campsite for a bicycle camp [Part 3]](https://radishsprouts.com/wp-content/uploads/2017/02/IMG_2017_02_19_3931-120x120.jpg)
![I went to Kasagi Campsite for a bicycle camp [Part 2] I went to Kasagi Campsite for a bicycle camp [Part 2]](https://radishsprouts.com/wp-content/uploads/2017/02/IMG_2017_02_18_3911-120x120.jpg)




![【Super cheap】Install a projector without drilling a hole in the ceiling at a rented house [Chinese] 【Super cheap】Install a projector without drilling a hole in the ceiling at a rented house [Chinese]](https://radishsprouts.com/wp-content/uploads/2020/06/vlcsnap-2020-06-08-16h55m17s441-120x120.jpg)
